

出嚟行走江湖最緊要
有種


全新版面

哨牙硬種
Sourdough Stiff starter
一切由來的開始
The world start from here

檢查「長洲哨牙種」硬種酵母
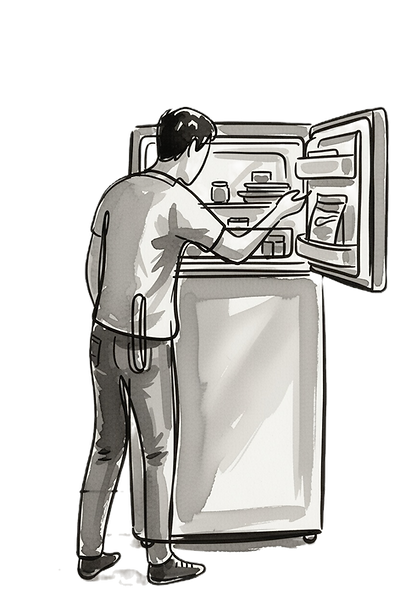
每次要用長洲哨牙種之前,先從冰格取出,看看呢個「BB」狀態如何。
如果牠還是像「米芝蓮 BB」一樣圓鼓鼓、肥肥白白,代表牠喺冷凍狀態下仍然好健康、有力,只要慢慢解凍就可以準備使用。
如果你發現牠變得瘦削、扁塌、氣孔少,表示酵母活性已經下降,需要連續餵養幾次,讓牠重新變得活躍、精神飽滿之後,再正式用來做麵包。
Here’s a clean English version you can use in your notes:
Checking the “Cheung Chau Stiff Starter”
Before using the “Cheung Chau Stiff Starter”, take it out from the freezer and check the baby’s condition.
If it still looks round and plump, like a little “Michelin baby”, it means the starter has stayed healthy and strong in the freezer and can be gently thawed and prepared for use.
If it looks skinny, flat and with few visible bubbles, it means the activity has dropped and you need to feed it a few times in a row to wake it up again before using it for bread.


準備一個乾淨玻璃瓶,最好先用滾水燙洗,確保徹底風乾。
然後就可以開始重新喚醒你的酵母種。
Prepare a clean jar. It’s best to rinse it with boiling water and let it dry completely.
Now we can begin reactivating the starter.


初始步驟(從長洲開始的酵母菌)


-
從長洲取得的哨牙種(100%水合的液態酵母),取出全部。
-
加入50%的麵粉,混合攪拌成麵團(難圍)。使用保鮮膜(保解)包裹以鎖住水分,再用布和繩子紮緊。
-
在室溫下靜置兩小時,讓酵母開始發酵。之後放入冰箱(零度以下冷凍環境)冷凍,可永久保存。
-
建議每三至六個月從冰箱取出一次,進行激活,重複製作原始酵母種。


黑菲爾 KEFIR


黑菲爾乳酪(Kefir)的簡介 黑菲爾乳酪(Kefir)是一種發酵乳製品,源自牛奶或其他乳源經特定微生物發酵而成。其名稱源於土耳其語「keyif」,意為「感覺良好」,反映了其傳統上被視為有益健康的特性。以下從起源、製作過程及相關益處等方面進行說明,基於科學文獻的概述,旨在提供教學參考。 第一節:起源與歷史 黑菲爾乳酪起源於北高加索山脈地區,約在數世紀前由當地遊牧民族發現並傳承。歷史上,它主要流行於東歐(如俄羅斯、烏克蘭)、中亞及北非部分區域,成為家庭常見的傳統食物。據記載,早期的黑菲爾乳酪由羊皮袋中自然發酵的牛奶產生,牧民世代相傳其製作方法。19世紀後,隨著移民與貿易,其使用範圍擴展至全球,但仍以東歐及北非家庭為主,家家戶戶常備菌珠(grains)用於日常發酵。這與南方亞洲的發酵食物(如米酒或優格)不同,黑菲爾乳酪更強調共生微生物的長期培養,而非單一菌株。 第二節:黑菲爾乳酪菌珠與製作原理 黑菲爾乳酪的核心是菌珠(Kefir grains),這是一種由酵母菌、乳酸菌及醋酸菌組成的共生體,外觀似小花椰菜粒,質地膠狀。菌珠非人工合成,而是自然形成的聚合物,包含多達30-50種微生物,能在室溫下重複使用。 製作過程如下: 準備材料:取新鮮牛奶(或羊奶、山羊奶),室溫約20-25°C。 加入菌珠:將1-2%菌珠(例如,每升牛奶加10-20克菌珠)浸入牛奶中。 發酵步驟:置於密閉容器中,室溫發酵24-48小時,期間定期輕搖以促進均勻發酵。發酵後,牛奶變成微酸、略稠的乳酪狀液體,pH值約4.0-4.5。 分離與維護:用濾網分離菌珠,成品可立即飲用。菌珠可清洗後重複使用,置於新鮮牛奶中儲存於冰箱(4-8°C),每週餵食一次以維持活性。 溫度與時間管理至關重要:過高溫度(>30°C)可能導致過酸或菌株失衡;過低則延緩發酵。菌珠的活性需定期觀察,若出現異味或變色,應丟棄部分並重新培養。 第三節:對炎症的潛在益處 黑菲爾乳酪含有豐富的益生菌(probiotics),如乳酸桿菌及雙歧桿菌,這些微生物可調節腸道菌群,進而影響全身免疫反應。科學研究顯示,黑菲爾乳酪具有抗炎作用,可能有助於減輕慢性炎症相關疾病,如強直性脊柱炎或關節炎。 機制:益生菌可抑制促炎細胞因子(如TNF-α、IL-6)的產生,促進抗炎因子釋放,改善腸道屏障功能,從而減少系統性炎症。動物及人體試驗顯示,定期攝取黑菲爾乳酪可降低關節炎症標記,並改善骨密度。 證據概述:多項研究(如發表於《PMC》及《Frontiers》期刊)指出,黑菲爾乳酪對免疫調節及骨骼健康有益,但效果因個人體質、劑量及持續時間而異。對於關節炎患者,建議每日攝取200-500毫升,但需在醫師指導下使用,避免與某些藥物互動。 注意事項:雖然益處有初步證據支持,但非醫療替代品。過敏者或乳糖不耐症者應選擇低乳糖變體或水基黑菲爾。


My best favour for drink
-
飲用版〈每日克菲爾酸奶:由 grains 開始〉
-
開頭:簡單講克菲爾係乜嘢、同超市乳酪有咩分別。
-
Step by step:
-
第 0 天:醒菌、準備乾淨玻璃樽、建議比例(例:1 湯匙乳酪菌:1 杯全脂奶,之後可以 1:1 放大)。
-
每日發酵:室溫 24 小時,攪拌、觀察稠度同酸味。
-
「逐日加倍」寫法:
-
Day 1:1:1
-
Day 2:改做 1 份菌:2 份奶
-
Day 3:1 份菌:4 份奶(強調:用「加奶多過加菌」去放大,所以味會溫和啲)。
-
-
點樣避免太酸:用少啲菌、多啲奶、發酵時間縮短,或者發到七八成熟就收入雪櫃慢慢完成。
-
-
第二段 Step by step:
-
「飲用酸奶」版本:隔出 grains,成品入樽雪凍。
-
加水果/蜂蜜/香料做第二次發酵,順便再講下 second ferment 可以減回酸味、味道更複雜。
-
-
結尾:一個簡短「每日 routine」示例(例如三日一輪、點樣一次過用晒幾日嘅奶)。
-
My best favour for cheese
-
芝士版〈克菲爾軟芝士與乳清:一次分離兩種食材〉
-
開頭:解釋「其實只要多一步,就由酸奶變成抹得開嘅 soft cheese,同時拎到一樽乳清」。
-
Step by step(假設前一篇已經有「完成發酵嘅克菲爾酸奶」):
-
將發酵好的克菲爾倒入濾器(咖啡濾紙/紗布+篩,底下放碗接乳清)。
-
雪櫃慢慢滴 8–24 小時,寫清楚:
-
滴 6–8 小時:比較軟,似希臘乳酪。
-
滴 12–24 小時:變成抹得開嘅芝士。
-
-
上層係軟芝士:可以加鹽、香草、蒜、橄欖油,變抹醬或者 dip。
-
下層乳清:列幾個用法(例如做麵包液體、水果氣泡飲、浸穀物)。
-
-
溫和味道策略:同樣可以提到「如果原本克菲爾已經做得冇咁酸(少菌多奶、較短發酵),做出嚟嘅芝士味道會更柔」,同前一篇邏
-
麵包配方 BREAD RECIPE
哨牙刀嘅 酸種麵包
我用一個統一嘅名字叫 Sourdough,但實際上,所有麵包都係用自家培養嘅天然酵母,配搭清晰、自然嘅材料,冇添加乳化劑同化學改良劑。每一款配方都經過長時間低溫發酵,讓麵粉、酵母同乳酸菌慢慢工作,換來更易消化、香味更深嘅麵包。
四款基礎配方介紹
-
Plain Sourdough 酸刀白麵團
以較低筋麵粉配合高筋麵粉,透過不同比例去控制口感,由較柔軟到較有嚼勁都可以調整。 -
Rye Sourdough 酸刀黑麥麵團
用 T170 黑麥粉加上兩款白麵粉,黑麥帶出更深層穀物香味同纖維感,酸度會明顯啲,適合鐘意「真‧酸種」風味嘅人。 -
Wholegrain Sourdough 全麥酸刀麵團
以法國 T150 全麥粉做骨幹,再配兩款白麵粉,保留麩皮同胚芽,口感扎實、香氣近似穀物粥,係「每日早餐」好選擇。 -
Cocoa Sourdough 酸刀可可麵團
-
用比利時可可粉配兩款白麵粉,麵團本身帶淡淡朱古力香味,可以純吃原味,亦可以配榛子、乾果或者橙皮。


Sourdough Bread
At my little bakery on Cheung Chau, I use one simple name – Sourdough – but in fact every bread is made with my own natural yeast, clear ingredients and no emulsifiers or chemical improvers.
Each recipe goes through a long, cool fermentation so the flour, wild yeast and lactic acid bacteria have time to work, making the bread easier to digest with a deeper aroma.
Four base recipes
-
Plain Sourdough
A blend of lower‑gluten and high‑gluten wheat flours. By adjusting the ratio, the texture can range from softer and lighter to chewier and more elastic. -
Rye Sourdough
Built on French T170 rye flour plus two types of white flour. The rye gives a stronger grain flavour and more fibre, and the acidity is a bit more pronounced for people who enjoy a “true sourdough” profile. -
Wholegrain Sourdough
Based on French T150 wholegrain flour with two white flours. The bran and germ are kept, so the crumb is denser with a toasted grain aroma – a good everyday breakfast bread.
Cocoa Sourdough
-
Made with Belgian cocoa powder and two white flours. The dough carries a gentle chocolate aroma and works well on its own or with nuts, dried fruit or candied orange peel.
配方及步驟 做 Sourdough 麵包 呢個流程做標準做法,四款麵團都通用。 混合與自溶 按當日揀嘅配方,量好硬種/液種、麵粉同水(先唔加鹽同麥芽糖)。 粗略拌勻至冇乾粉,靜置 20–40 分鐘,等麵粉吸水、筋度自然形成。 加鹽、麥芽糖與主和麵 加入海鹽同麥芽糖,慢慢揉至麵團光滑、有少少延展性。 若做 Ciabatta / Focaccia,可以同時加入特級初榨橄欖油,麵團會較軟,更濕潤。 主發酵(室溫長時間發酵) 室溫發酵 2–4 小時,期間每 30–60 分鐘做 1 次拉伸摺疊,幫麵團建立筋度。 當麵團體積約膨脹 50–70%、手感輕盈,就可以進入預整形。 預整形與中場休息 將麵團分割成你想要嘅重量(例如 600 g),輕手滾圓或摺成粗略長條。 靜置 15–30 分鐘,讓筋度放鬆,方便最後整形。 最後整形與入籃 / 入模 依款式做最後整形:圓形、橄欖形、長條或吐司形。 灑粉籃 / 模具內鋪好布,放入麵團,封口向上或向下視乎你想要嘅裂紋效果。 冷藏發酵(過夜慢發) 放入雪櫃 4–8°C 冷藏發酵一晚,時間視乎配方與酸度喜好,一般 8–20 小時。 呢一步係你全部麵包「長時間低溫發酵」嘅核心,味道會更立體,亦較易消化。 預熱焗爐與割包 焗爐連烤石或鑄鐵鍋預熱至高溫(例如 230–250°C)。 從雪櫃取出麵團,脫模/倒出,快速割出你習慣嘅刀口圖案,方便麵包在爐內膨脹。 蒸氣烘焙 入爐後頭 10–15 分鐘要有蒸氣(用鑄鐵鍋蓋焗、或者放盤熱水/石仔噴水),幫助麵包展開。 之後放走蒸氣,調低少少溫度,焗至外皮呈金黃甚至深啡、底部拍落有空心聲。 冷卻與品嚐 出爐後放在架上完全放涼至少 2 小時,黑麥和全麥 需要更長嘅時間四至六個小時 讓內部水分穩定再切。 第二日用煎鍋、焗爐再次加熱,酸麥香會更加突出。
Bake one sourdough loaf This flow can be your standard method for all four formulas; only the flour and hydration follow each specific chart. Mix and autolyse Weigh your stiff or liquid starter, flours and water according to the chosen recipe (leave out the salt and maltose for now). Stir until no dry flour remains, then rest 20–40 minutes so the flour hydrates and gluten starts to form. Add salt, maltose and knead Add sea salt and maltose, then knead gently until the dough feels smoother and more elastic. For ciabatta or focaccia, add extra‑virgin olive oil at this stage; the dough will be softer and more tender. Bulk fermentation (room‑temperature rise) Let the dough ferment at room temperature for 2–4 hours, doing 1 set of stretch‑and‑fold every 30–60 minutes to build strength. When the dough has risen about 50–70% and feels lighter and airier, move on to pre‑shape. Pre‑shape and bench rest Divide the dough into the weights you want (for example around 600 g each), gently round or shape into loose logs. Rest 15–30 minutes so the gluten relaxes and final shaping becomes easier. Final shaping and into basket/tin Shape into a boule, batard, long loaf or sandwich shape, depending on the style. Prepare floured proofing baskets or lined tins, place the dough inside with the seam up or down depending on the scoring pattern you want. Cold fermentation (overnight proof) Refrigerate at 4–8°C for an overnight proof, usually 8–20 hours depending on the formula and your preferred acidity. This is the heart of my process: long, cool fermentation builds flavour and makes the bread gentler on the body. Preheat and scoring Preheat the oven with a baking stone or Dutch oven to high heat (around 230–250°C). Take the dough from the fridge, turn it out of the basket or tin, and score quickly with your usual pattern to allow good oven spring. Bake with steam For the first 10–15 minutes, bake with steam (closed Dutch oven, or a tray of hot water / stones with sprayed water) to help the loaf expand. Then vent the steam, lower the temperature slightly and bake until the crust is deep golden to brown and the base sounds hollow when tapped. Cooling and eating Cool the bread completely on a rack for at least 1 hour, for rye and wholegrain need 4-6 hours, so the crumb can set before slicing. On the second day, re‑heat slices in a pan or oven – the sour and grain notes become even more expressive.
參考連結 REFFERENCE LINK
-
A Non-Baker's Guide To Making Sourdough Bread Channel By Alex The french guy
-
A Sourdough Masterclass for Home Bakers Channel by Grant Bakes
-
The Old Faithful - an easy sourdough recipe that produces an amazing country style loaf
-
Simple Sourdough Bread: Step by Step 🍞🍞75% Hydration Channel by Alexandra's Kitchen
-
15 Mistakes Most Beginner Sourdough Bakers Make Channel By ProHome Cooks
-
YOUR FIRST SOURDOUGH (Sourdough Bread For Complete Beginners)
-
牛角包酥脆因為加橙汁?如何分辨酸種麵包真假?物理研究員棄讀Master 開麵包店拆解法式麵包秘密 梅窩麵包鋪37小時發酵整平民價 by MM
法棍麵包
法棍麵包係我第一款自己研發嘅天然酵母麵包。由 2018 年 3 月 22 日開始試做,一直不停試驗、調整,到 6 月先正式喺長洲做第一次 pop‑up 預購,俾島上街坊試食。 呢條法棍用好舊式嘅做法:完全唔用工業酵母,冇乳化劑,同埋任何非天然添加,所以同一般麵包店嘅法包好唔同,但喺做法同精神上都盡量貼近傳統法棍。
而家主要有兩個版本:
-
白法棍:全程用法國 T65 小麥粉和意大利00TYPE製作, 有時就會轉用日本嘅高筋麵粉去取代00TYPE。
-
可可法棍:用比利時可可粉混合 T65 麵粉和意大利00TYPE製作,麵包帶淡淡朱古力香,但唔係甜包。
你可以簡單配橄欖油加少少海鹽、配芝士同凍肉,或者當作每日餐桌麵包,同屋企人或者朋友喺長洲海邊慢慢分享。


Baguette
The French baguette was the first natural yeast bread I developed. I started this formula on 22 March 2018, and kept trying and adjusting until June, when I finally launched my first pop‑up pre‑order for neighbours on Cheung Chau. I bake it in a very old‑fashioned way: no industrial yeast, no emulsifiers, and no non‑natural additives, so it tastes very different from commercial bakery baguettes while staying close to traditional baguette methods.
Most of the time I offer two versions:
-
Plain baguette – made with French T65 flour and italian 00type
-
Cocoa baguette – made with cocoa powder blended into T65 flour and italian 00type giving a light chocolate aroma without becoming a sweet bread.
You can enjoy these baguettes simply with good olive oil and salt, with cheese and cold cuts, or as a daily table bread to share at home or on the beach in Cheung Chau.
法棍:步驟指南(天然酵母版) 第 1 步:準備麵團 依你嘅法棍配方,量好液態酵母、T65 粉+00 粉同水,先唔好加鹽同麥芽糖。 粗略攪勻,做到「見唔到乾粉」,蓋好靜置 20–30 分鐘自溶。 第 2 步:加鹽、麥芽糖同第一次和麵 加入海鹽同麥芽糖,慢慢揉至麵團表面順滑、有少少拉得開嘅感覺即可,唔需要打到好勁。 整成一大坨,放入乾淨容器,蓋上。 第 3 步:主發酵同拉伸摺疊 室溫發酵大約 2.5–3.5 小時,每 30–45 分鐘做一次拉伸摺疊(由四邊向中間摺),總共 3–4 次。 當麵團體積漲到約 1.5 倍、摸上手覺得輕身,就可以預備分割。 第 4 步:分割同預整形 將麵團倒出,平均分成你想要嘅重量(例如 250–300 g 一條)。 每份麵團輕手摺成粗長條,封口向下,靜置 15–20 分鐘,等筋度放鬆。 第 5 步:最後整形 – 做成法棍 將麵團翻起,輕輕拉長、摺疊、搓成均勻長條,兩端可以略尖,做到你習慣嘅長度。 放在灑粉布巾上,中間用摺起嘅布做「山形」隔開幾條麵團,防止黐埋。 第 6 步:最後發酵 室溫最後發酵約 45–75 分鐘,視乎溫度;用手指輕按麵團,慢慢回彈但唔完全彈起,就差唔多。 或者選擇放入 4–8°C 雪櫃,冷藏發酵 6–12 小時,第二日即焗。 第 7 步:預熱焗爐、割包同入爐 焗爐連烤石預熱至大約 240–250°C,底層預備一個放熱水嘅鐵盤做蒸氣。 將法棍移到烤紙或熱石上,快速斜向割 3–5 刀,刀口略重、略重疊。 噴少少水入爐或倒熱水入鐵盤,立即關門。 第 8 步:烘焙同冷卻 高溫連蒸氣焗約 10–12 分鐘,再放走蒸氣、降至 220–230°C,焗多 8–12 分鐘至金黃帶深色。 出爐放在架上完全放涼至少 45–60 分鐘先切,外皮 crack crack、內心輕身就為之一條完成嘅法棍。
Baguette – step‑by‑step (natural yeast) Step 1 – Mix dough Measure liquid starter, T65 + 00 flour and water according to the baguette formula (no salt or maltose yet). Mix until no dry flour remains, cover and rest 20–30 minutes (autolyse). Step 2 – Add salt, maltose and first knead Add sea salt and maltose. Gently knead until the surface feels smoother and can stretch a little; it does not need to be very strong. Shape into one dough ball in a clean container and cover. Step 3 – Bulk fermentation with stretch & fold Ferment at room temperature for about 2.5–3.5 hours. Every 30–45 minutes do one set of stretch‑and‑fold from four sides to the centre (3–4 times in total). Stop when the dough has grown to about 1.5 times and feels lighter. Step 4 – Divide and pre‑shape Turn the dough out and divide into the weights you want (for example 250–300 g per baguette). Gently fold each piece into a loose log, seam down, rest 15–20 minutes to relax the gluten. Step 5 – Final shaping – baguette Flip the dough, gently lengthen, fold and roll into an even stick; make the ends slightly pointed if you like. Place on a floured couche or cloth, with folds of cloth between each stick to keep them apart. Step 6 – Final proof Proof at room temperature for about 45–75 minutes, depending on temperature. Lightly press with a finger; if it slowly springs back but not fully, it is ready. Option: cold‑proof 6–12 hours at 4–8°C and bake the next day. Step 7 – Preheat, score, bake Preheat the oven with stone to 240–250°C and prepare a tray for steam. Transfer baguettes to baking paper or stone, score 3–5 diagonal cuts, slightly overlapping, then add steam (water on hot tray or spray) and close the door. Step 8 – Finish baking and cool Bake 10–12 minutes with steam, then vent, lower to 220–230°C and bake another 8–12 minutes until deep golden. Cool on a rack at least 45–60 minutes before slicing so the crumb can set.
參考連結 REFFERENCE LINK
-
[The EASIEST Sourdough Baguette Recipe on YouTube – Full Proof Baking
-
[Mastering the Art of Sourdough Baguettes: A Step-by-Step Guide for Perfect Crusty Loaves – The Bread Code]
-
[Traditional Sourdough Baguette Recipe by a Professional Baker – Bake with Jack]
-
[Sourdough Baguette Recipe (with Video) – Pants Down Aprons On]
-
[自家製天然酵母こねないバゲット作り方 – No Knead Sourdough French Baguette – Homemade Sourdough]
-
[自家製酵母で簡単バゲット – Sourdough Easy No Knead No Work Baguettes With Unfed Starter – Homemade Sourdough]
拖鞋包 & 富家茶
係我店入面少數偏軟身嘅麵包,用嘅都係同一個「橄欖油白麵團」。麵團加咗特級初榨橄欖油,口感比一般酸種麵包柔軟,內層濕潤兼有好香嘅油果味。麵粉主要由意大利 00 麵粉配法國 T65 麵粉組成,既輕身,又保留到適當嚼勁。


Ciabatta & Focaccia
The only “soft breads” I bake regularly. They are both made from my olive‑oil dough, enriched with extra‑virgin olive oil for a softer crumb and a rich, fragrant flavour. The flour base is mainly Italian type 00 combined with French T65, so the dough stays light yet still has a good chew.
Ciabatta 拖鞋包:步驟指南 第 1 步:高水合橄欖油麵團 依「橄欖油白麵團」配方,量好液態酵母、T65+00 粉、水同橄欖油,先只混合粉、水同酵母,自溶 30 分鐘。 加入海鹽同麥芽糖,再慢慢加入橄欖油,用「摺疊+抓撕」方式做到麵團有筋但仍然偏軟、略黏手即可。 第 2 步:主發酵 – 多次摺疊代替搓揉 室溫發酵約 2.5–3 小時,每 30 分鐘做一次拉伸摺疊,總共 4–5 次,讓麵團有足夠支撐力。 完成時,麵團應該充滿氣泡、搖動有「啫喱感」。 第 3 步:冷藏慢發(可選) 想味道更立體,可以將整坨麵團放入雪櫃 4–8°C 過夜(8–18 小時),第二日整形。 用前先喺室溫回溫 30 分鐘。 第 4 步:分割拖鞋形 在工作枱灑大量粉,將麵團輕輕倒出,唔好「拍打排氣」。 用刮板直切成長方塊,輕手拉長少少就好,保持裡面氣泡。每塊隨意一些,拖鞋包唔需要完全對稱。 第 5 步:最後發酵 將麵塊放在灑粉布或烤紙上,蓋上布,室溫發酵 30–45 分鐘,表面見到明顯氣泡、手指按下去慢慢回彈就可以。 第 6 步:高溫焗,唔用割包 焗爐連烤石預熱至 240–250°C,預備蒸氣。 將麵塊連烤紙送入焗爐,噴水或加熱水做蒸氣,焗約 18–25 分鐘,視乎大小;底部拍起有空心聲即可。 出爐放涼,切開可以見到大洞洞、質地柔軟濕潤,適合夾餡或只配橄欖油海鹽。
Focaccia 富家茶:步驟指南 第 1 步:橄欖油麵團+第一次發酵 使用同一個「橄欖油白麵團」,水合度同油量可以保持一樣,令口感軟熟。 混合、自溶、加鹽同橄欖油後,室溫發酵 2–3 小時,期間做 2–3 次拉伸摺疊,直到麵團漲到 1.5 倍左右。 第 2 步:入盤油床休息 烤盤內倒入一層薄薄橄欖油,將麵團輕輕倒入,唔好排氣。 用手指由下向上拉開麵團,慢慢鋪滿整個烤盤,若麵團好「縮」,可以停手靜置 10–15 分鐘,再拉第二次。 第 3 步:最後發酵同「手指洞」 蓋上布或保鮮紙,室溫最後發酵 45–60 分鐘,直到麵團蓬鬆起來。 然後雙手沾油,用十隻手指同時垂直按落麵團,按出一粒粒小坑,唔需要刻意排氣。 第 4 步:加配料同調味 在表面淋多一層橄欖油,撒上海鹽,再按需要加迷迭香、洋蔥圈、橄欖、車厘茄等配料。 輕輕壓一壓,令配料黏實喺麵團上。 第 5 步:焗焗焗 焗爐預熱至 220–230°C。 將烤盤放入中層,焗約 20–30 分鐘,直到表面金黃、邊位略帶焦色,底部也焗香。 出爐後稍為放涼 10–15 分鐘,用刀切成小方塊或長條,熱食最香;凍咗可以重新用焗爐/平底鑊烤熱,配沙律、湯或前菜都好夾。
Ciabatta – step‑by‑step (olive‑oil dough) Step 1 – High‑hydration olive‑oil dough Use the “Olive Oil White Dough” formula: measure liquid starter, T65 + 00 flour and water, mix flour + water + starter only, and rest 30 minutes. Add sea salt and maltose, then slowly add extra‑virgin olive oil while using a stretch‑and‑fold / scoop‑and‑slap motion until the dough has strength but still feels soft and slightly sticky. Step 2 – Bulk fermentation with folds Ferment at room temperature for about 2.5–3 hours. Every 30 minutes do one gentle stretch‑and‑fold; repeat 4–5 times to build structure. The dough should be full of bubbles and wobble like jelly when you shake the bowl. Step 3 – Optional cold retard For more flavour, chill the whole dough 8–18 hours at 4–8°C, then bring back to room temperature about 30 minutes before shaping. Step 4 – Cut into “slippers” Generously flour the bench, gently pour the dough out without punching down. Using a bench scraper, cut into rectangular pieces and lightly stretch each piece a little longer. Do not try to make them perfect; keep the internal bubbles. Step 5 – Final proof Place pieces on floured cloth or baking paper, cover with a cloth and proof 30–45 minutes. When the surface shows bubbles and a finger press comes back slowly, they are ready. Step 6 – Bake without scoring Preheat oven and stone to 240–250°C with steam ready. Load ciabatta (with baking paper), add steam and bake 18–25 minutes until the bottoms sound hollow and the crust has good colour. Cool, then slice to check for large, irregular holes and a moist, soft crumb.
Focaccia – step‑by‑step (olive‑oil dough) Step 1 – Mix dough and first rise Use the same Olive Oil White Dough formula (same hydration and oil). After mixing, autolyse and adding salt + oil, ferment 2–3 hours at room temperature with 2–3 sets of stretch‑and‑fold until the dough has risen to about 1.5 times. Step 2 – Into the oiled pan Pour a thin layer of olive oil into the baking pan. Gently tip the dough into the pan without degassing. With oiled fingers, slowly stretch the dough towards the corners. If it shrinks back strongly, rest 10–15 minutes and stretch again. Step 3 – Final proof and finger‑dimple Cover the pan and proof 45–60 minutes until the dough looks puffy. Oil your hands, then press all ten fingers straight down into the dough to make many small dimples; do not push all the gas out. Step 4 – Topping and seasoning Drizzle more olive oil on top, sprinkle sea salt, then add toppings such as rosemary, onion slices, olives or cherry tomatoes. Press toppings gently so they sit firmly in the dough. Step 5 – Bake and serve Preheat oven to 220–230°C. Bake 20–30 minutes until the top is golden, the edges are slightly caramelised and the bottom is crisp. Cool 10–15 minutes, then cut into squares or strips. Serve warm on its own, with soup or as a sharing starter.
參考連結 REFFERENCE LINK
SOURNOTE TV
研究與靈感 / Research
哨牙坊入面,我唔只教大家點樣跟配方做麵包,仲好重視「點樣觀察世界」。其中一個重要工具就係 YouTube 播放清單。
這幾個精選播放清單,集合咗關於酸種麵包與腸道健康、發酵科學、起司製作、酵母與乳酸菌生命、同埋飲食文化同歷史嘅影片。 你會見到唔同國家嘅烘焙師、科學家同醫師,點樣從實驗室到廚房,解釋點解傳統發酵可以幫助消化、影響血糖,同支援腸道菌群。我亦會穿插中醫角度,思考發酵食品喺脾胃、腸道同整體氣血平衡入面嘅角色,令大家可以同時用西方科學同東方食療去理解同一塊麵包。建議你留時間慢慢睇晒呢啲片,再帶住問題返嚟上課,我哋可以一齊討論:哪些內容同你身體經驗共鳴?哪些地方你想喺自己麵包實驗?播放清單開始探索。
In this Sourclass, research does not live only in books – it also lives in real kitchens around the world. One of our key tools is a set of curated YouTube playlists.
These playlists bring together documentaries and lectures on sourdough and gut health, fermentation science, cheese making, and the microbial life of yeasts and lactic acid bacteria, as well as food culture and history. You will meet bakers, scientists, and health practitioners explaining how slow fermentation changes gluten, minerals, blood sugar and digestion, and how fermented foods support a diverse microbiome.
I also invite you to reflect through the lens of Chinese medicine and food‑as‑medicine: how do these foods interact with the Spleen–Stomach system and your own body experience? Take time to watch the playlists on my YouTube channel, then bring your questions and insights back to class so we can connect what you see on screen with the dough in your hands.


